Creating and Customizing Reviews and Playbooks
Last updated: November 17, 2026
Background
Every organization reviews contracts its own way. With Reviews & Playbooks, org admins can create, edit, test and publish their own Reviews and Playbooks in Document Crunch without having to ask our team to make each change. You write questions in plain language and Document Crunch writes the AI prompt for each one. You can then test the questions against a real document and publish when they’re ready. After you publish, your custom content appears next to Document Crunch’s standard Reviews and Playbooks, so your team can apply your organization’s standards to any project or document.
Things to Consider
Permissions: Only org admins can create and edit custom Reviews and Playbooks by default. To give someone else access, create a custom role with Create/edit custom Playbooks and reviews turned on. Viewing and deleting have their own separate permissions.
Size limit: Each Review or Playbook can have up to 150 questions. Subquestions don’t count toward the limit.
Excel import/export: Importing or exporting Excel files isn’t available right now. Start from scratch or copy an existing template instead.
Version history: Every publish saves a new version. You can open any earlier version from Version history and save it as a new draft. Earlier versions are never overwritten.
Reapplying after changes: If a Review was already applied before you published changes, apply it again to see the latest version.
Scope: Each Review or Playbook is either project level or document level. Ones you start from scratch are project level by default. Copies keep the original’s scope.
Steps
1. Open Reviews & Playbooks
Go to Organization Settings and select Reviews & Playbooks. The list shows each custom Review and Playbook with its type, status (Draft or Published), number of sections and questions, and when it was last updated.
2. Create a new Review or Playbook
Select New, then Create a review or Create a playbook. The steps below are the same for both.
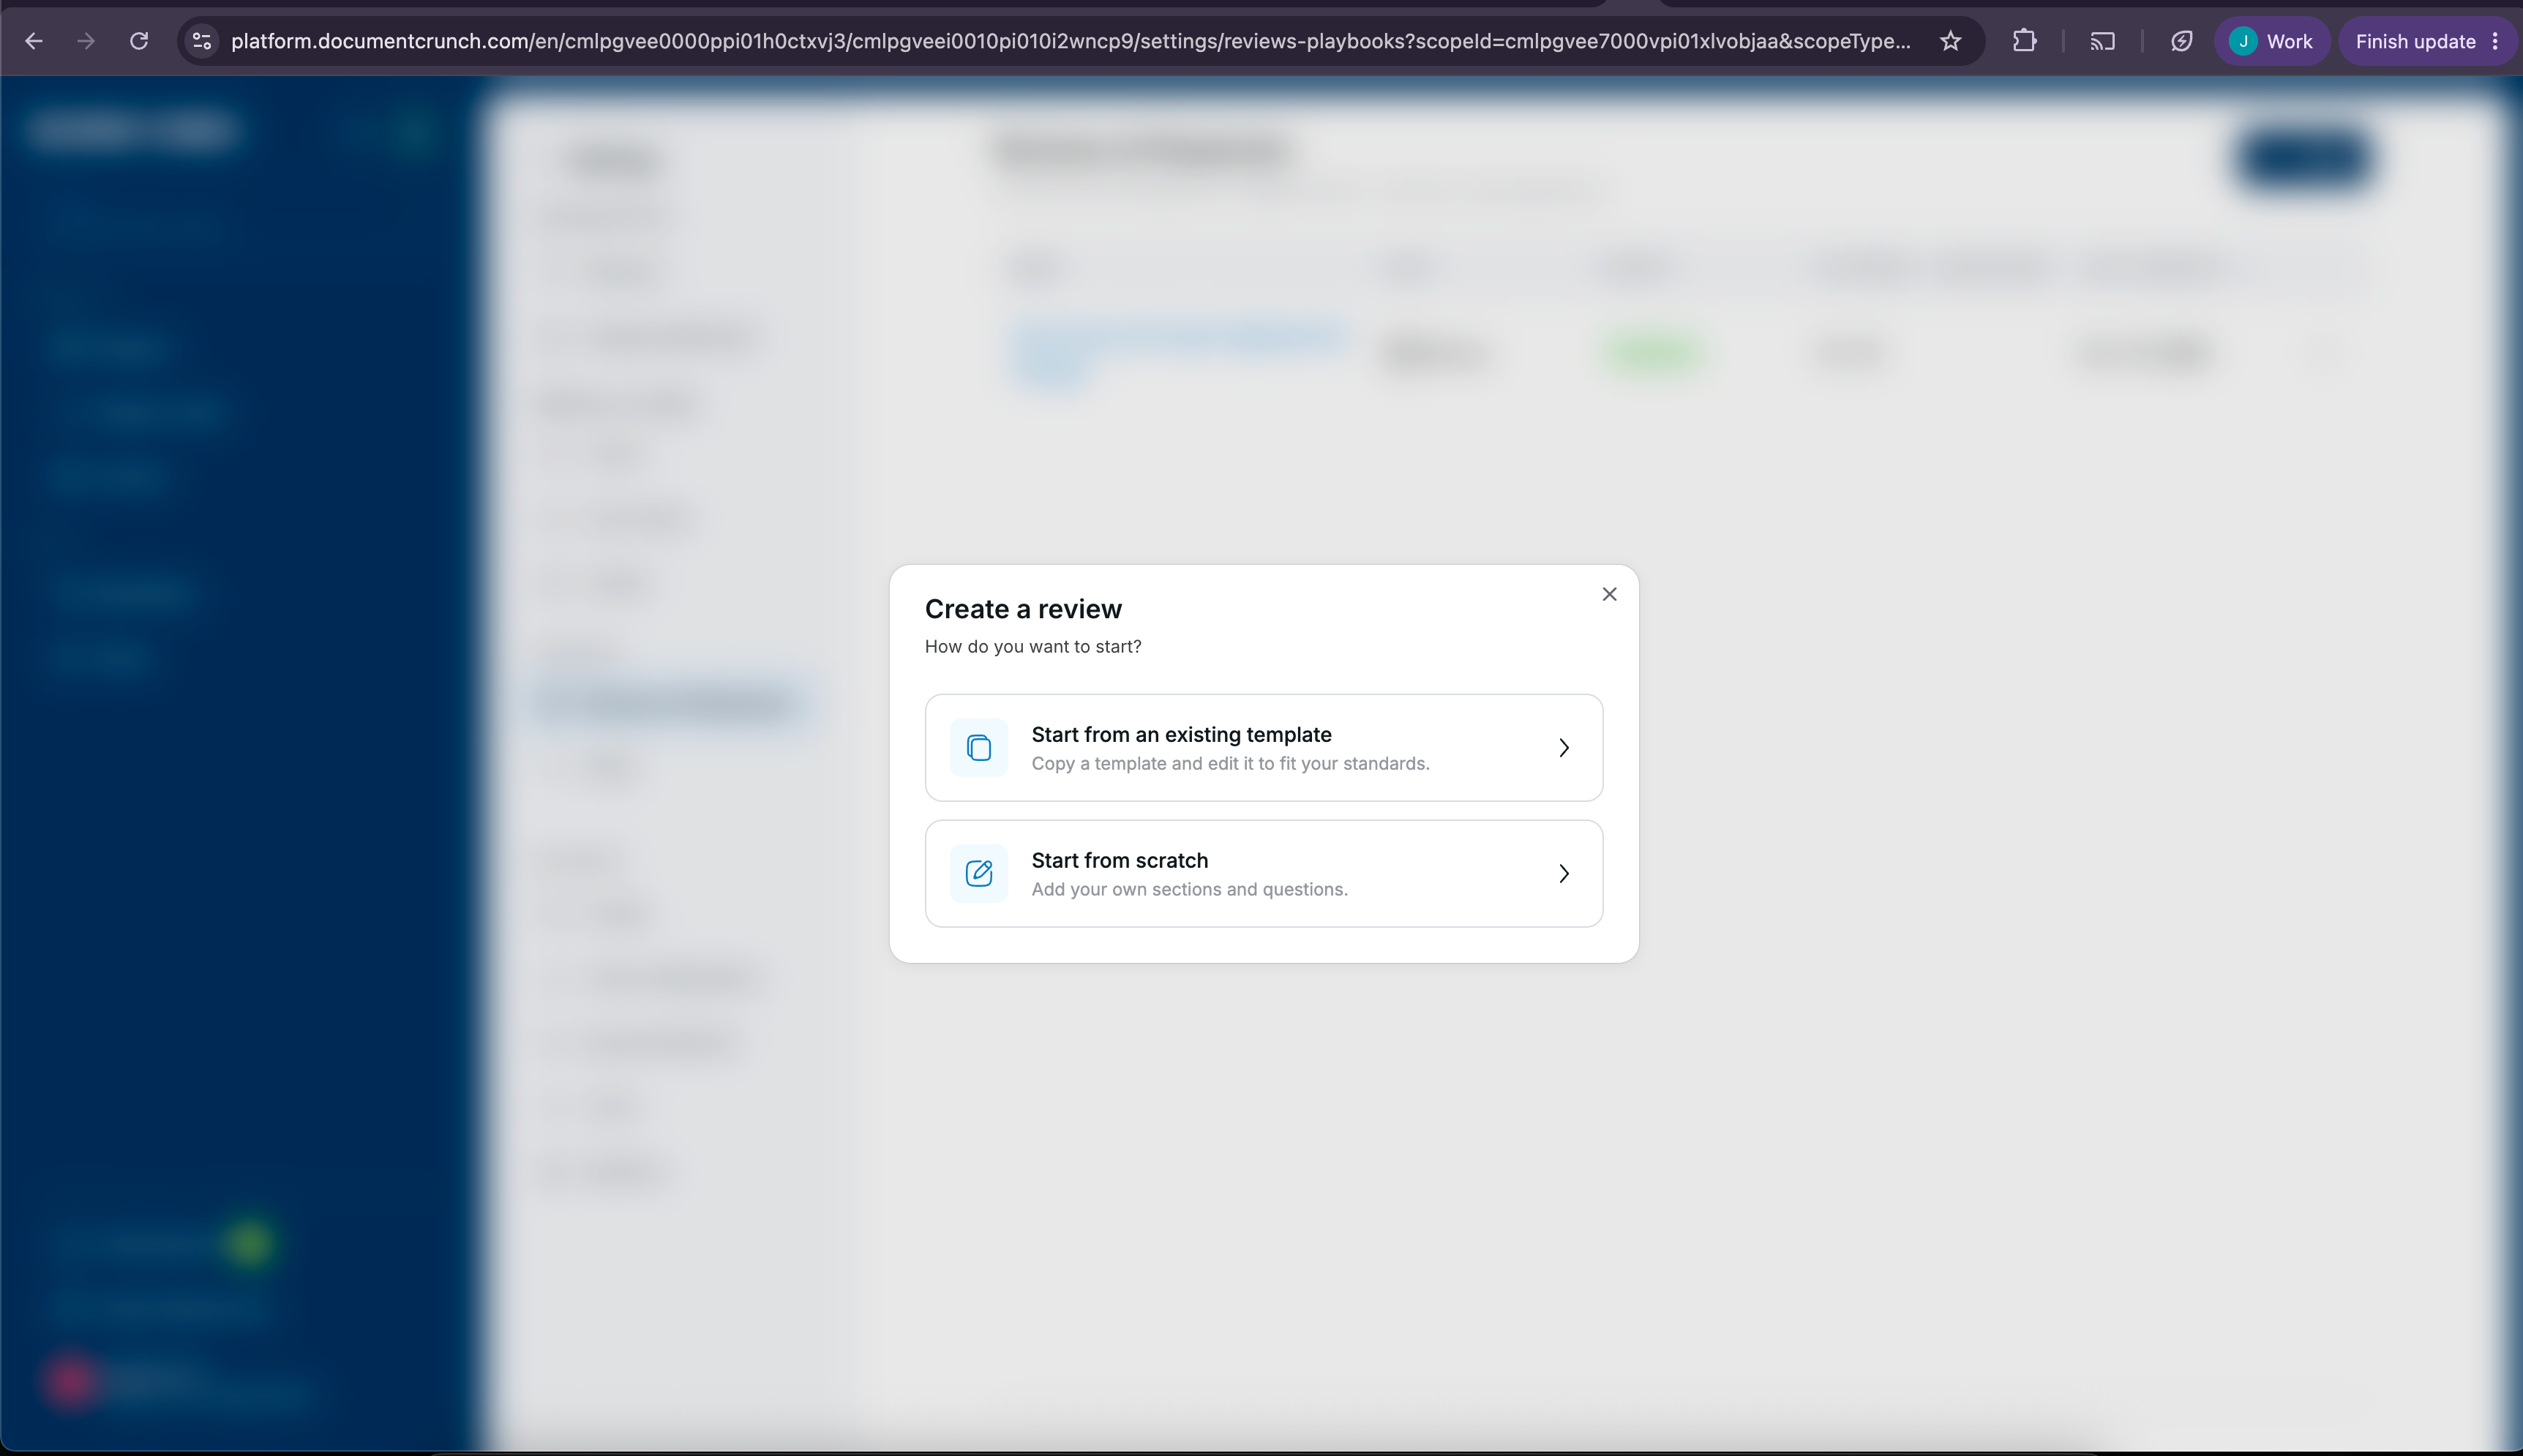
3. Choose how to start
Start from an existing template: Copy a Document Crunch standard Review or Playbook, or one your organization already made. Select Use review on the one you want.
Start from scratch: Add your own sections and questions.
4. Edit sections and questions
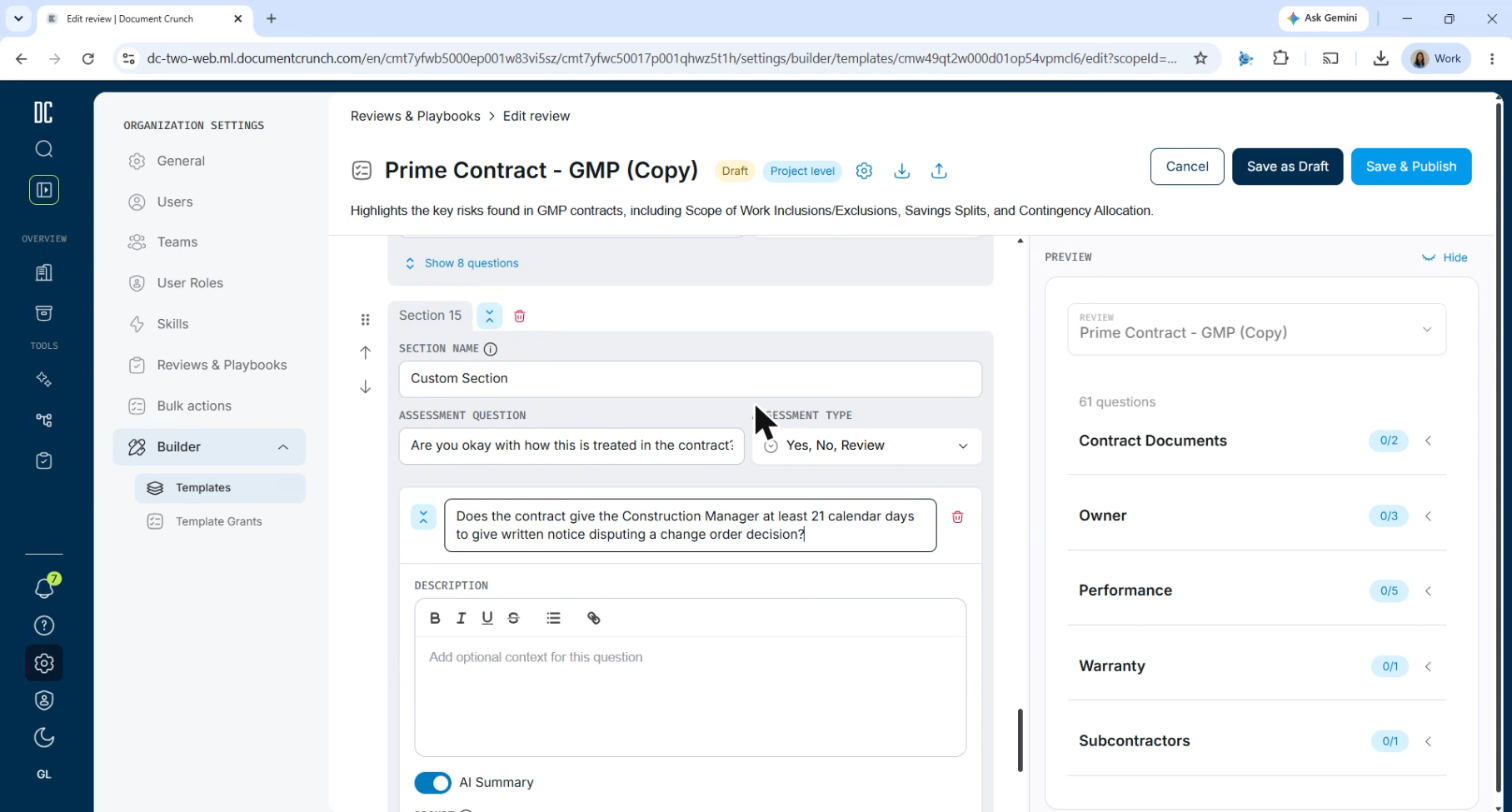
Your content is on the left of the editor and a live preview is on the right. You can expand a section to edit its questions, add new sections, and change a section’s assessment question or reset it to the default. Type each question the way you’d normally ask it. You don’t need to write a prompt.
5. Generate prompts
Select Generate prompt on a question, then Accept or Decline the suggestion. You can still edit a prompt after you accept it. If you save while some questions have no prompt, you’ll be reminded and can select Generate prompts for all.
6. Test a question
Select Test and choose a document. The preview shows the AI summary that question produces. Adjust the question or prompt and test again until the result reads the way you want.
7. Turn off AI Summary for task questions
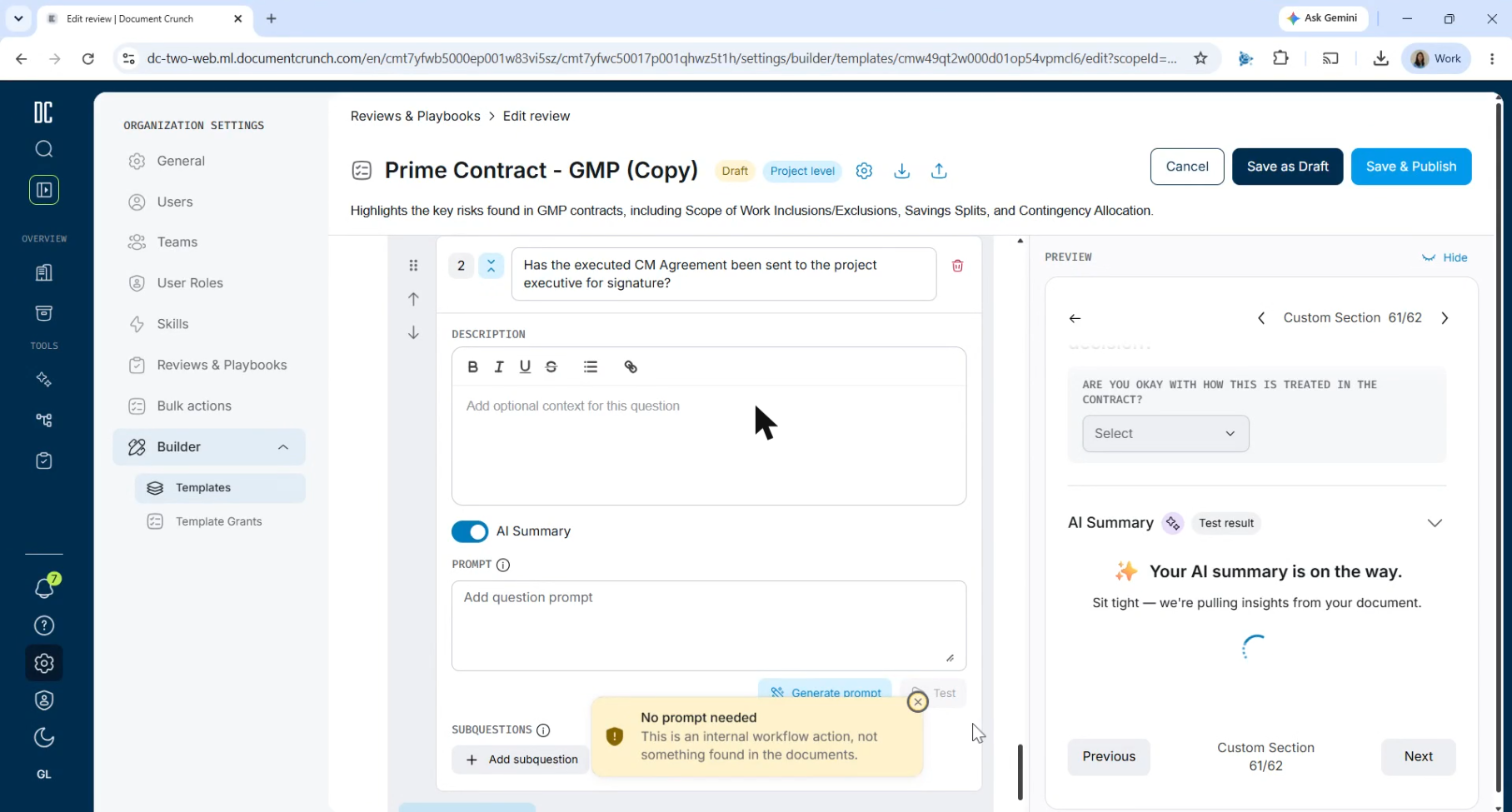
Some questions can’t be answered from a document, such as “Has the executed CM Agreement been sent to the project executive for signature?” Turn off the AI Summary toggle for these. If you select Generate prompt on one of these, Document Crunch marks it No prompt needed.
8. Set scope and document types
Open Settings (the gear icon).
Project level: Shows in the project review and applies to every document in the project.
Document level: Shows in a single document’s view and applies only to that document.
Under Suggest to document types, choose which document types it’s suggested for. A Review or Playbook you start from scratch is suggested for all document types by default. Copies keep the original’s document types. Version history is also in Settings.
9. Publish
Select Save as Draft to keep working, or Save & Publish to make it available to your organization. To make changes after publishing, select Create New Version.
10. Go back to an earlier version (optional)
Open Settings (the gear icon) and go to Version history.
Open the ⋯ menu on the version you want and select Open version.
Select Save as new version. This copies that version into a new draft with the next version number. Earlier versions stay as they are.
Make any other edits, then select Save & Publish.
Note: As with any publish, apply the Review again anywhere it was already applied to see the changes.
11. Apply it
Published custom Reviews appear in Apply Reviews next to the Document Crunch reviews, at the project or document level depending on their scope. Org admins also see a Manage reviews link here that opens Reviews & Playbooks.
12. Unpublish (optional)
To stop people from applying a Review, select Unpublish in the editor or from the menu in the Reviews & Playbooks list.
It no longer appears in Apply Reviews.
Results from earlier runs stay where they are.
An editable draft is saved as a new version. To make it available again, publish the draft.